Monday, August 30, 2010

{More Awesome Freebies & Tips}

I went kind of crazy today scouring the internet for cool wedding freebies and DIY tips for weddings, and I thought I would share them with you.  First up, is WeddingChicks, they have customizable wedding templates, menus, invitations and more.  I am so loving their bicycle themed invitation and RSVP card.  It reminds me of a bicycle built for two.


I've also found some great stuff over at MyWeddingDay, my favorite being their DIY flower boutonniere.  When I have time, I am actually going to try this out, since I have a bucket full of all sorts of buttons!  I have a few engagement shoots coming up and I think it would be awesome to show these off.


I thought this was kind of nifty.  It is a rose petal "cone".  Basically print, cut it out, and fill it with rose petals or other flower petals/alternatives.  At the end of the day, your  guests can shower you with love and petals!

Have fun and be crafty!
Pin It

Sunday, August 29, 2010

{Maryland Renaissance Fair Opening Day}

Yesterday was the opening day to one of my favorite events of the year, the Maryland Renaissance Fair. I have been a "rennie" since 2005, when my husband first took me, and I have been addicted since. In fact, one of the primary reasons why I learned to sew was so that I can make my own garb to wear. When I go in for something, I go IN! The renaissance fair is so much fun, and I highly suggest that if you ever have a chance to go, you take it. My favorite fair is the Maryland Renaissance Fair, but I've been to the Pennsylvania Renaissance Fair and the Arizona Renaissance Fair also.

Since I was so busy having loads of fun, I did not get as many pictures I liked, but here are a few. I promise to get more next weekend, which is the big Labor Day Invasion, and an absolute blast to attend.


When I go next week, I promise to take more pictures, especially of the shows and other playtrons that attend. It truly is a magical experience. I am super excited because I am actually shooting a wedding at the Maryland Renaissance Fair on September 25th! How awesome is that?

I am also excited about the upcoming engagement/couples sessions that I am about to shoot. I have some very cool locations & themes in mind.

Stick around for the next exciting installment of "Days of Our lives"! Just kidding!
Pin It

Thursday, August 26, 2010

{Rock the Dress: Ann}

I am loving these Rock the Dress sessions more and more.  I'm lucky to be surrounded by so many people with vintage wedding gowns, or even vintage dresses worn as gowns. I love all things vintage! Something about a dress from the 1940's or 1950's transforms you into old Hollywood glamor, it's so amazing.

Today I did a Rock the Dress session with the lovely Ann.  And her dress, was absolutely gorgeous.  She wore a deep ivory floor length dress that was made in the 1940's, with black peep toe sandals.  Not the traditional white wedding gown, but still gorgeous none the less.  And to top it off, she even had her hair done in classic 40's style with deep red lipstick!

Here are a few pictures from the shoot:


The weather was gorgeous, the dress was gorgeous, and of course Ann was gorgeous in it.  I can never get tired of doing this sessions.  Especially being that besides photography, I love fashion...particularly that of the vintage variety.  I get to see so many amazing dresses and meet so many amazing people!

I'm looking forward to the fall to schedule some Rock the Dress sessions then.  Imagine a white or ivory wedding gown surrounded by the warm oranges and reds that come with the fall!  It will look gorgeous.

So remember ladies, contact me to set up your session asap!  MarisaTaylorPhotography@gmail.com.  Have a great night!
Pin It

Monday, August 23, 2010

{Wedding Dress Inspiration: Dolly Couture-Retro Inspired Wedding Dresses}

I am pretty sure that you already know of my love of all things vintage and glamorous.  And if you didn't know, now you do. I am obsessed with clothing from the 1920's-1950's, the renaissance, and Victorian time periods.  Since my other love is sewing, I do a lot of costuming research and spend hours drooling over vintage wedding dresses.  And since I am a lover of all things wedding related, and a wedding photographer (obviously), I definitely have to share with you one of my favorite wedding dress designers.

Her name is Dolly Thicke, and she is the owner and designer of Dolly Couture.  I first saw her dresses on the show, Whose Wedding is it Anyway?.  Where a bride was having a 1950's Las Vegas themed wedding.  When I saw the dress, I was amazed, and spend the next 2 days doing a search to find out the designer.  I have lusted after her dresses for about a year now. Although I am already married, if I ever were to have another wedding/vow renewal,  a Dolly Couture dress is what I am going to be wearing.

So, I am going to stop boring you, and show you just how amazing her dresses are. First up is the Beverlywood dress. My absolute favorite, and the one that I would wear to my vow renewal, or even just buy it to have it because it is that amazing!


Next, we have the Moon River, which is inspired by Audrey Hepburn. Who doesn't love her?


Another favorite of mine, is the San Marino


There are more dresses on her website that you just have to check out. Like I said, I would probably buy one just to have it, and feel amazing whenever I put it on.  Hmm...maybe this will be a Christmas gift for myself.  And what perfect vintage dress is complete without a big, fluffy, petticoat to wear underneath it.  Dolly Couture offers petticoats also!

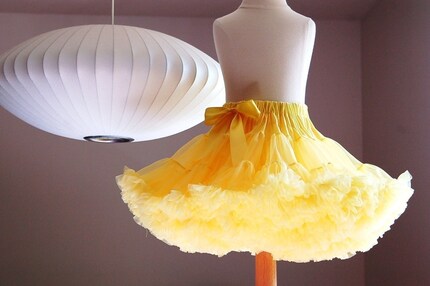
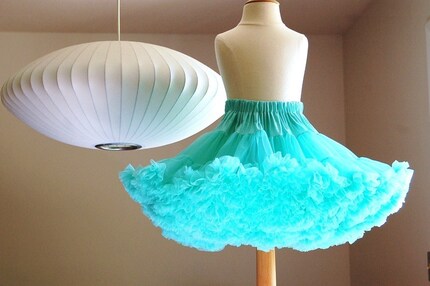
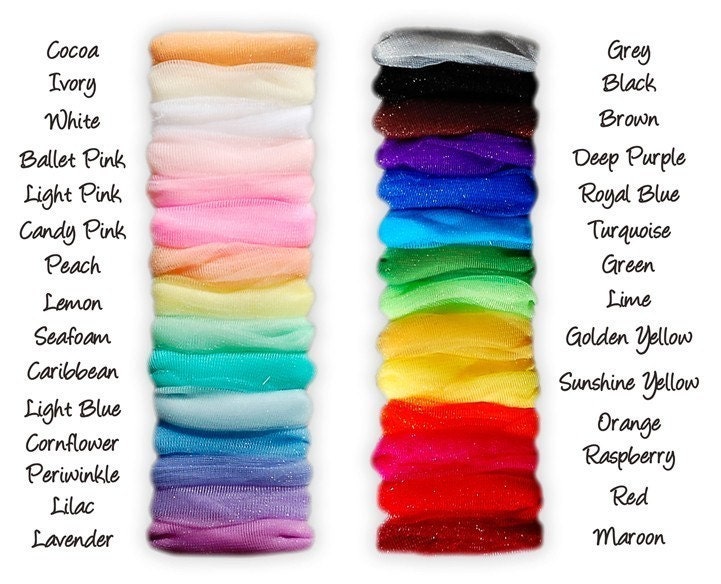
Now, talking about petticoats, I also found this amazing store on Etsy, that sells custom size, length,and colored petticoats.  The store is DreamSpun Kids on Etsy, and their adult petticoats are to die for!


Have fun shopping!
Pin It

Saturday, August 21, 2010

{Wedding Decor Inspiration}

My husband and I are huge Disney fans.  When we got engaged, we went to Disney, for our honeymoon we went to Disney, and we are planning to go to Disney World in 2011.  I have a ton of Disney items around the house, and my husband, has probably every single Disney song/soundtrack known to man.  Earlier tonight, were discussing a Disney movie, "The Princess and the Frog", and I thought of an awesome wedding decor/theme.

There is a scene in the movie, where Tiana (the main character), and Prince Naveen travel deep into the bayou to meet with Mama Odi, who happens to be the local (good) witch.  They need her help to turn them back to humans from frogs.  During the scene, Mama Odi breaks into a song "Dig a little deeper", and that is where the inspiration comes from.  In the scene, you see Mama Odi singing underneath a tree with hanging glass bottles, and it is so pretty.  I thought it would be so pretty to see a wedding take place under a huge tree, with lots of glass bottles hanging from trees. It would be a great DIY project, especially if you wanted to decorate the bottles.

Here is the video of the scene I am talking about, towards the middle of the song is where she leaves the house, goes outside and sings underneath the glass bottles.


Now, apparently it is a common thing to hang glass bottles from trees in the south, so obviously this is nothing new. But I still think that it would look amazing as wedding decor.  Plenty of colorful glass bottles, hanging from ribbon or twine, shimmering in the sunlight.

And here is where it gets even better!  Instead of just having the glass bottles hanging.  Why not have the bottles set up on a table prior to the wedding starting.  When the guests arrive, have each guest write a note to the couple instead of writing in the guestbook.  And each guest can take that note, drop it in a bottle and hang the bottle from the tree.  It will be amazing to watch the transformation, and see the decor change.  If you have a cunning groom, he could probably even set it up as a surprise, so when the bride walks down the aisle, she will see the hanging bottles and I am sure she will be breathless.

Another thing to do, going with the note in the bottle theme, is to have the bottles corked after the note is dropped in.  The bride and groom can then open up the bottles on their one year anniversary.  It sounds cheesy, but I think it's adorable!  I admit, I am somewhat of a hopeless romantic.

If you think that this is an awesome idea, here are some links to purchase colored glass bottles:

http://www.lunabazaar.com/decorative-colored-glass-bottles.aspx\

http://www.couronneco.com/glass-bottles.htm

http://www.fritzers.com/colored-glass-bottles.html

http://www.backyardbirdsdiscoverycenter.com/bottle-trees.html
Well folks, that is my wedding decor splurge for the evening.  Pass it on, and share. I would love to see decor like this at real weddings!
Pin It

Thursday, August 19, 2010

{Heartfelt Words}

Today I received probably the best email and review that I have ever read. It is from the father of one of my past brides, and it moved me to tears when I read it. I love what I do, and will always love it. But, it is letters like this, that make me love my job even more.

"As the father of the bride, I must say that Marisa went above and beyond what I would have expected from a wedding photographer. We booked Marisa very close to the wedding date, as originally we were not going to go with a wedding photographer. But when my daughter came across her site, she knew she had to have her.


Marisa is probably the sweetest, caring, most outgoing (business)person that I have ever met. She was such a joy to work with when it came to the booking process. Because the wedding date was so close, and the wedding was not in her local area, we didn't get a chance to meet her. But she came down a bit earlier than booked to meet with the family, my daughter, and my son in law before the wedding.


She was all smiles the entire day. I don't think I have ever seen anyone who loves their job as much as she does. She works AMAZINGLY with children, and seems to bring out the fun in all of us when she is photographing the wedding. By the end of the night, we had her dancing and having fun with us. I've been to many weddings, and never have felt so close and personable with the photographer.


Now, onto her photography. She definitely has her own true style. I've seen many great wedding photographers, and although Marisa is quite humble, she is definitely a diamond in the rough. She is able to do something with photographs that I just can't put my finger on. It goes beyond just taking a good picture, it's almost as if she can sense the emotion building up, and captures it right as it happens. The woman has spidey sense!


Because my daughter and son-in-law were so happy with the pictures, I am happy. I feel that Marisa is now part of the family. She is just that amazing."


Each wedding I do is special, and everyone involved in each wedding is special to me.  I take my time to get to know each and every single couple that I am working it, so that I can do my job better when I am there.  I want to say thank you to those who have said kind words and have encouraged me to keep doing what I love doing.  You all rock!!!

Pin It

Wednesday, August 18, 2010

{DIY Project: Chalkboard Speech Bubbles}

The new craze lately at weddings have been awesome speech bubbles.  They give some extra fun and spark to your photos.  Many have been using them for their photo booth wedding photos.  Admittedly, they are quite fun.  Anything that makes you look like a cartoon is awesome.  Now you can easily buy these on sites like Photojojo or Etsy, but being the craftaholic that I am, I decided to try to make my own. And it was a success! So here I am sharing it with you!  Now, here is what you need.

1) Chalkboard paint, or chalkboard contact paper.  I found my chalkboard paint at JoAnns for $6.99.  It came in all sorts of colors!  Hot pink, red, purple, blue, black, green, and white.  Personally, the chalkboard contact paper is easier to cut and use, and you get your results instantly-instead of having to wait for the paint to dry.  You can order the chalkboard contact paper online, I unfortunately, had no luck in finding it in any of my local stores.


You will also need a brush, designed for painting with heavy acrylic paint.  I found mine at JoAnns also.


Next you will need some type of foam poster board, thin wooden board, or any type of flat board (that you are able to cut) that has a porous surface.  I chose white poster board (the kind you show school projects/presentations on) from Staples.


And of course, you need chalk!


So here is what you need to do! Forgive me for not having pictures of the process, but it was late, I was bored, and I looked  a mess!

1-Lay out all supplies!  Chalkboard paint, paintbrush, foam board, scissors or knife (preferably an Exacto knife set), chalk, and large piece of paper to paint on.

2-Cut out whatever shape you wish your speech bubble to be.  For me, it was easy to make a square/rectangle shape since I was rushing and using a knife.  When you have more time, and an awesome cutting set, you can cut out circles, ovals, hearts, and whatever else!  Be sure to include the little triangle shape at the bottom that shows where the speech is coming from

3-Once your shape is cut out, open up your paint, and paint a thick layer of chalkboard paint onto your shapes.  Make sure the entire surface is covered evenly

4-Let first layer dry completely.  Probably about 1 1/2-2 hours.

5-Paint another layer of chalkboard paint onto your shapes.

6-Let dry completely for 24 hours.

7-Condition your new chalkboard!  The way you do this is taking the chalk, rubbing the side of it all over the board, and erase.

8-Have fun!!!

I had a blast using these to "speak" to my husband without actually speaking to him.  The conversation went on for about an hour!  Here is my final result:


Now my edges look rough because I was rushing through the project with a knife, and didnt properly finish it.  So remember, paint the surface and the edges!  Or you can take a contrasting color of ribbon or paper in the width of the board, and glue it on!
So have fun and get creative! Perfect to use at your weddings, parties, or like me, just around the house!  Send me some of your completed projects!!! I would love to see,
And for all things awesome, check out the DIY section of the WeddingChicks website (I am so in love with everything they offer!)
Pin It

Saturday, August 14, 2010

{Wedding: Jessica & Kyle}

Can I just say how much I love my job? Meeting people like Jessica and Kyle, their entire family and wedding guests makes me love what I do more and more each day. By the end of the day, I felt like a part of the family!

Jessica and Kyle were married in Lewes, DE. The ceremony was held at the Canal Front Park Marina, which was decorated gorgeously. The theme was a beach wedding, and little touches of the sea were added. Such as starfish and shells. The colors were soft, with pinks and blues, and everything just looked amazing.  After the ceremony, we headed to the beach to get some shots of just Jessica and Kyle.  This was my first time being at the beach, so it was quite a fun experience for me!

Jessica looked gorgeous in her wedding gown! A flowing empire waist dress with beading along the neck and shoulder line, with a flower hair clip.  She said that her friend made the clip, and it was gorgeous! So once I know more details of her friend, I will of course pass along the news.  The bridesmaids wore tiffany blue dresses (my favorite color).  The groom, Kyle was laid back and casual in khakis, flip flops, and a button up shirt. The entire feel of the wedding was fun and casual, and it was a blast to shoot! The day was full of laughter, hugs, dancing, and happiness...everything a wedding should be!

With as many fun and crazy moments that happened during their day it is hard for me to choose just a few favorites, but here is a sneak peak of their day:


Pin It